 Terry Mulkearns
Can't resolve Storage Account DNS from VNET, but can from Internet
An ambiguous name for a hard to track down issue! When you are doing a NSlookup for a blob endpoint on a Storage Account in a Virtual Network in...
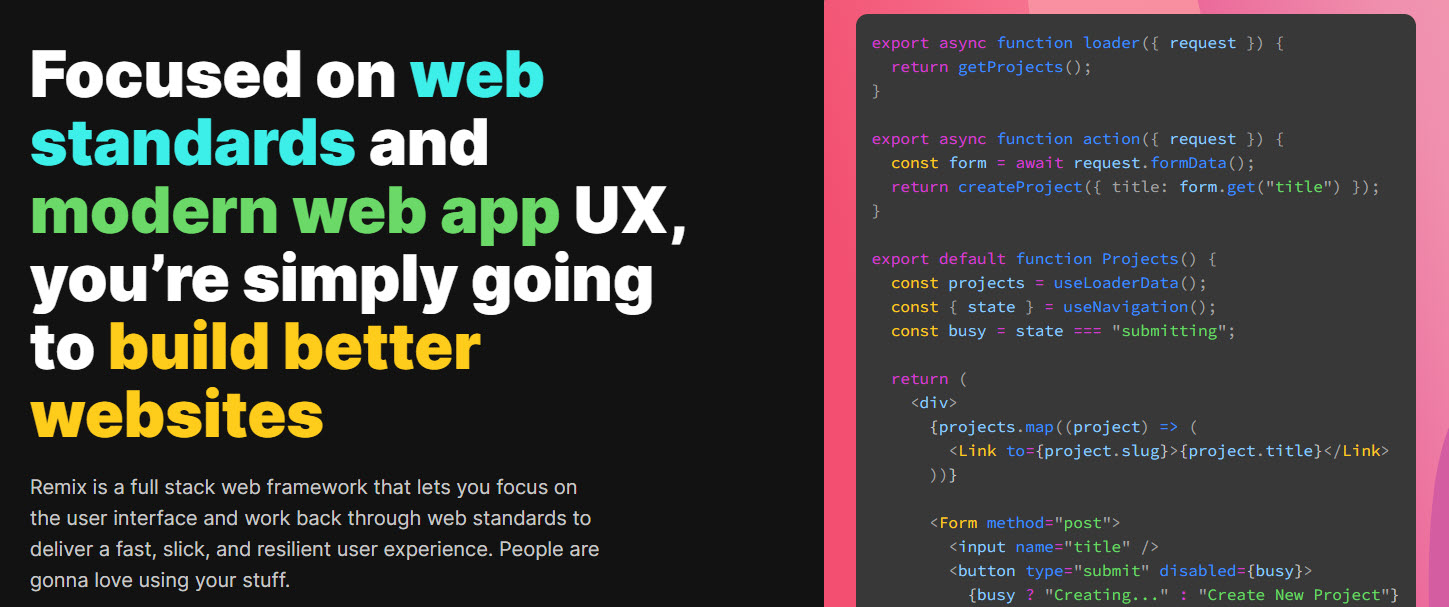
What is Remix? It is one of the full stack frameworks recommended by the React team for building entire web apps. A number of concepts in Remix are based on React. Developers who are familiar with React, JavaScript / TypeScript and JSX should find that Remix is a comfortable fit.
There are some great resources that you can read through to gain a more in depth understanding of what Remix is and how it works. This blog post isn’t an exhaustive reference to Remix, but a beginning. I’ve included a number of links at the end of this blog post.
Here at Arkahna we have adopted Remix as our standard web framework. We’ve used it to build a number of SaaS products as well as web apps for our customers. Using Remix has allowed us to iterate faster and to deliver quality web apps in shorter timeframes.
I’ve been using Remix over the last few months to build out one of our new SaaS products. Coming from a background of using .NET for many years, there is a learning curve that I needed to work through. React and TypeScript have been at the top of my list of things to learn for a while, and using Remix is giving me the opportunity to learn both.
Most developers who have worked on web apps have spent time dealing with interactions between the front end and back end of their apps. Trying to keep these aligned can create certain challenges. “Who removed that property from the API endpoint? Thanks, you’ve just broken the front end.” There are tools available to help with these types of challenges, but at the end of the day there is still a divide between the front end and back end.
Remix describes itself as a “centerstack” web framework. This concept blurs the lines between what is considered the front end and what is the back end. It allows developers to build functionality once and let the framework handle the heavy lifting between the browser and server. No more need to align your API endpoint responses with models defined in JavaScript! A developer simply needs to define how to load the data for a page, the content to display on the page, and how to handle any actions (such as a form post). Remix takes care of everything in between.
One of the amazing things with Remix is what happens when JavaScript is disabled in the browser. The web app just keeps working! Remix is smart enough to fall back to standard HTTP requests to continue serving the app. The user experience isn’t as great as when JavaScript is enabled but the app continues to work.
One of the Remix concepts I want to demonstrate is routing and how it is used to build pages within a web app. At first glance, it may not be obvious how a list of routes in a Remix app translates to pages in a web app. The examples below should provide an introduction to how routing works.
Routing in Remix is based on React Router. A route defines the URL path to a page in a web app. It can also define partial pages that are loaded into areas of a parent page. Refer to the Remix documentation for a more in-depth explanation of how routing works.
This screenshot shows the structure of the demonstration web app. All of the files in the /app/routes folder represent routes in the web app.
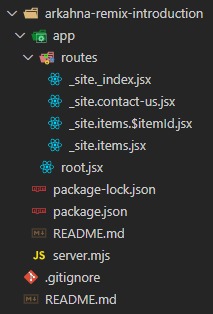
The routes will produce the following URLs for the web app:
| Route | URL |
|
_site._index.jsx |
/ |
|
_site.contact-us.jsx |
/contact-us |
|
_site._items.jsx |
/items |
|
_site._items.$itemId.jsx |
/items/[id] - note that [id] is a dynamic value |
The naming convention for routes helps to define the URLs that they produce. Some of the conventions demonstrated in the example routes are:
Before diving into a specific route, let’s take a quick look at the root.jsx file. This file defines the container of the web app. As we can see in the example below, it contains the content that is shared across all pages in the web app. I won't describe every Remix specific element on this page, but the ones of note are:
Outlet - this is where the body of the page will be loaded into
Link - the nav links are using a Remix specific link instead of the standard <a> element. This allows Remix to dynamically load pages into the Outlet element instead of performing full page loads
These elements, plus other ones used on the page, are imported from the @remix-run/react package
import { Link, Links, LiveReload, Meta, Outlet, Scripts } from "@remix-run/react";

export default function App() {
  return (
    <html>
      <head>
        <link rel="icon" href="data:image/x-icon;base64,AA" />
        <meta name="viewport" content="width=device-width,initial-scale=1" />
        <Meta />
        <Links />
      </head>
      <body>
        <h1>My awesome Remix app</h1>
        <ul>
          <li>
            <Link to="">Home</Link>
          </li>
          <li>
            <Link to="items">Items</Link>
          </li>
          <li>
            <Link to="contact-us">Contact us</Link>
          </li>
        </ul>
        <Outlet />
        <Scripts />
        <LiveReload />
      </body>
    </html>
  );
}
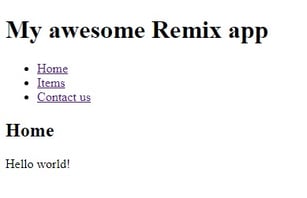
Navigating Between PagesThe home page of the web app contains the following content, which is sourced from the _site._index.jsx route:
export default function IndexPage() {
return (
<>
<h2>Home</h2>
<p>Hello world!</p>
</>
);
}
Those that are familiar with React may recognise this as a React component. The content is loaded into the Outlet element in the root.jsx file and produces the following:
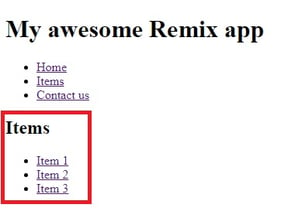
Say we wanted to navigate to the Items page. Typically, this would be a link to an entirely separate page, or it may be a call to an API to retrieve some data which is used to hydrate a client-side component. When we click the Items link, Remix loads the content from the _site._items.jsx route into the Outlet element which produces:
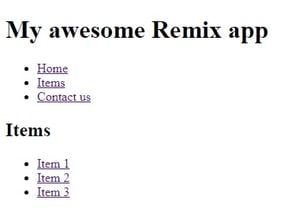
How did Remix render the Items page? It didn’t reload an entirely new page but used a SPA-style method to load in the content for the page. The only section of the page that changed was:
We didn’t need to create any API endpoints or any client-side specific components. Remix took the content from the _site._items.jsx route and loaded it into the page for us! Let’s have a look at the network requests that occurred when we opened the home page and navigated to the Items page:

The first 13 requests loaded up the container page (root.jsx), the home page (_site._items.jsx) and a number of other Remix resources. The last request, highlighted in red, is the one that occurred when we navigated to the Items page. The request was simply for a JavaScript file that contains the content for the Items page (_site._items.jsx).
This navigation method provides users with a better experience as they do not need to wait for entire page loads. A typical SPA app loads sections of a page in a waterfall method - the container page may load, then each section in that page loads individually. Remix loads routes in parallel. This prevents users from waiting for one part of the page to load before another.
Developers are advantaged by only having to create their content once. Remix handles the loading of the content between the server and browser.
One way to load dynamic content into a page is to export a loader function from the route. The loader function can be used to fetch data that will be displayed on the page. It runs on the server side and exports a JSON string which is imported by the component. For those familiar with the MVC pattern, the loader is essentially the Controller, the component is the View, and the Model is what is passed between the 2.
The Items page (the _site._items.$itemId.jsx route) contains an example of creating data in the loader function and consuming it in the component. Another thing to note in this example is that we’ve included another Outlet element - this allows us to load child routes into this route.
import { Link, Outlet, useLoaderData } from "@remix-run/react";
import { json } from "@remix-run/node";

export const loader = async () => {
  // Get items from external source
  const items = [
    {
      id: 1,
      name: "Item 1",
    },
    {
      id: 2,
      name: "Item 2",
    },
    {
      id: 3,
      name: "Item 3",
    },
  ];

  return json({ items });
};

export default function ItemsPage() {
  const { items } = useLoaderData();

  return (
    <>
      <h2>Items</h2>
      <ul>
        {items.map((item) => (
          <li key={`${item.id}`}>
            <Link to={`${item.id}`}>{item.name}</Link>
          </li>
        ))}
      </ul>
      <Outlet />
    </>
  );
}
Following on from the Items example, this route contains an example of loading and displaying a specific item. This is the _site._items.$itemId.jsx route which includes a dynamic value in its URL. The example demonstrates how the $itemId segment maps to the itemId parameter in the loader function.
import { json } from "@remix-run/node";
import { useLoaderData } from "@remix-run/react";

export const loader = async ({ params }) => {
  const itemId = params.itemId;

  // Get item from external source
  const item = {
    id: itemId,
    name: `Item ${itemId}`,
  };

  return json({ item });
};

export default function ItemPage() {
  const { item } = useLoaderData();

  return (
    <>
      <h3>Item details</h3>
      <p>Item: {item.name}</p>
    </>
  );
}
The result of these 2 routes is as shown below. As we included another Outlet element in the Items page, the only thing that is loaded when an item link is clicked is the item details.

The example shown below, which is from the _site.contact-us.jsx route, demonstrates how we can display a form and handle the POST event from it.
The component is standard HTML, with the exception of the Form element. We are using the Remix Form element instead of the standard HTML form element which allows Remix to handle the POST event rather than the standard way the browser does.
The route exports an action function. This function handles various HTTP events such as POST, PUT and DELETE. The action attribute for the Form element has been set to post, so the form will perform a POST when submitted. The action function demonstrates how to extract the data from the form fields.
This route does not export a loader function. The loader function does not always need to be defined - the component will simply be rendered without it.
import { redirect, Form } from "@remix-run/react";

export const action = async ({ request }) => {
  const formData = await request.formData();

  // Validate form data

  const name = formData.get("name");
  const email = formData.get("email");

  // Persist data

  return redirect("/");
};

export default function ContactUsPage() {
  return (
    <>
      <h2>Contact us</h2>
      <Form method="post">
        <p>Name</p>
        <p>
          <input id="name" name="name" placeholder="Name" type="text" />
        </p>
        <p>Email</p>
        <p>
          <input id="email" name="email" placeholder="Email" type="email" />
        </p>
        <p>
          <button type="submit">Send</button>
        </p>
      </Form>
    </>
  );
}
Grab the source code for these examples from this repository.
Related ToolingThese are some of the tools that we are currently using in our Remix web apps. We re-evaluate these from time to time to ensure they are still fit for purpose or to determine if there are better alternatives.
We use Prisma as our ORM to define and interact with databases. This provides us with a lot of the great features that come with using an ORM, such as: defining the structure in code, migrations, and easy ways to query and update data.
We host our Remix apps in Azure Container Apps. This gives us the power and scalability that Kubernetes offers without the requirement to become Kubernetes gurus. Remix apps can be hosted on many platforms, but Azure Container Apps is currently our preferred one.
We use Express as the HTTP server. It is a tried and tested HTTP server which provides a middleware layer that can be leveraged for things such as defining headers, compression and health checks.
The server.mjs file in the sample app contains a simple Express implementation. One of the great things in the implementation is the call to broadcastDevReady when the Node environment is development. This enables hot reloading whenever a file changes.
Thank you for reading our first blog post dedicated to Remix! We’re planning to add more blog posts targeted at specific Remix concepts and examples.
Here are some interesting links for further reading:
Remix docs - includes tutorials to get you started
Bardic Beatz - Arkahna’s demo web app built with Remix

An ambiguous name for a hard to track down issue! When you are doing a NSlookup for a blob endpoint on a Storage Account in a Virtual Network in...
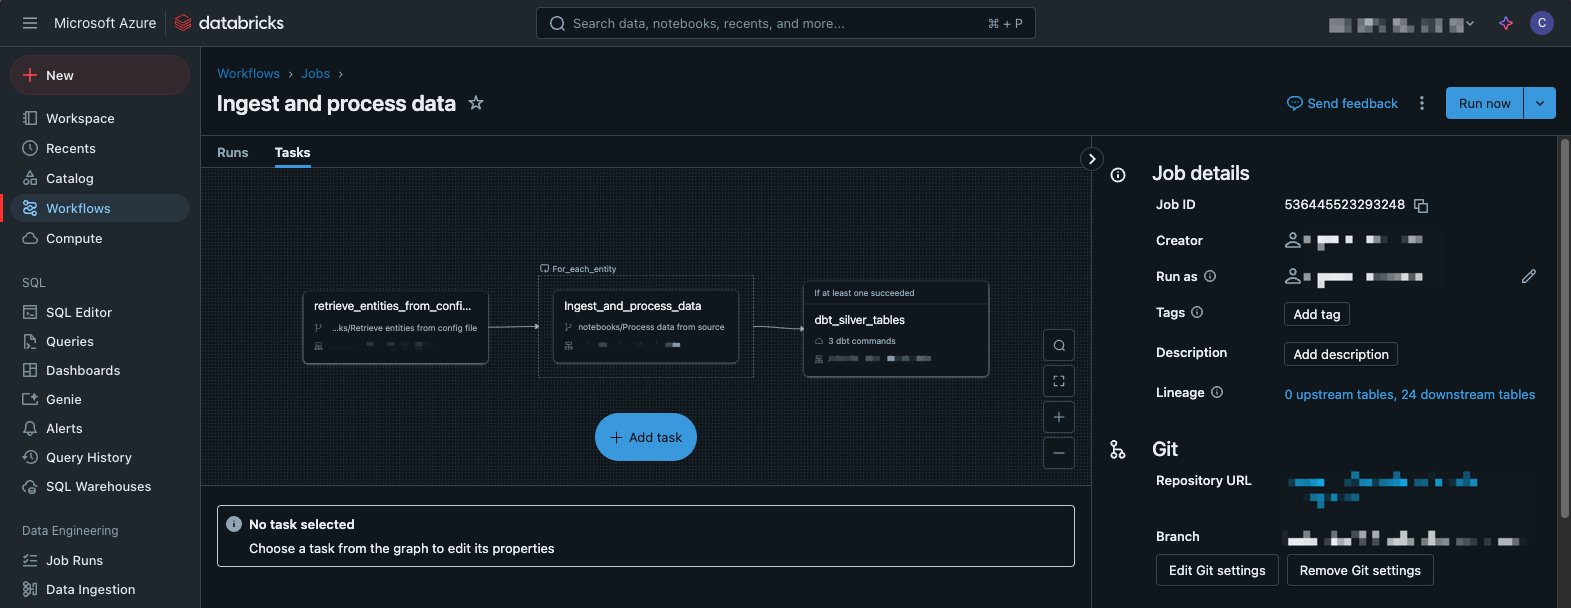
There are a lot of platforms both new and old available for managing data at an enterprise scale. When it comes to refreshing the foundation of a...